
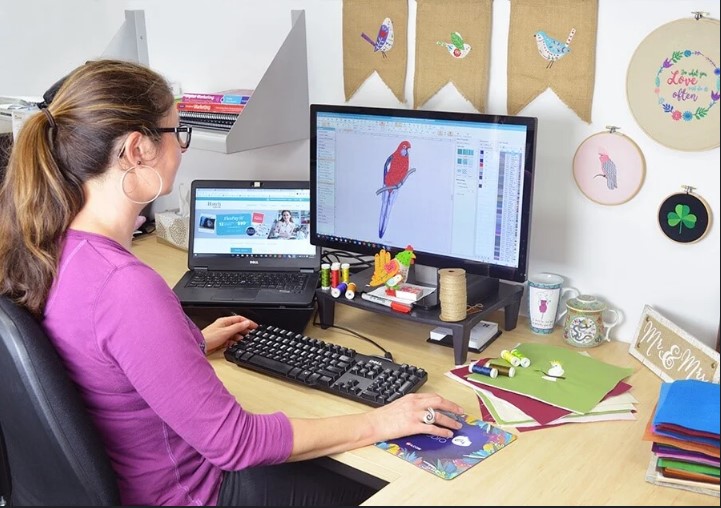
So, you’ve got Hatch Embroidery software, a killer design idea, and a machine ready to go. But before you press “start,” there’s one big question: what stitch type should you use?
Stitch type selection can make or break your final design. The right stitch gives your work texture, depth, and a professional finish. The wrong one? It could lead to puckering, loose threads, or a clunky, hard-to-read design.
In this guide, we’ll break down the most important stitch types in Hatch Embroidery, when to use each one, and how to choose the perfect stitch for your project.
Want your designs digitized professionally instead? Digitizing Buddy offers expert embroidery digitizing services for any design, ensuring you get the right stitch types and flawless results every time.
Let’s thread the needle and dive in.
Why Stitch Type Matters in Embroidery
Think of stitch types as the paintbrushes of embroidery. Each one creates a different texture, direction, and feel. Your choice impacts:
- Durability
- Design clarity
- Fabric compatibility
- Stitch time and thread usage
In Hatch, you’ve got tons of control—but that also means a lot of decisions. Knowing when to use a satin, fill, or run stitch (among others) will help you get consistent, professional results.
The Main Stitch Types in Hatch Embroidery
Let’s look at the key stitch types you’ll use most often in Hatch:
1. Satin Stitch
The go-to for clean outlines and bold text.
- Best for: Borders, small shapes, lettering under 1 inch
- Look & feel: Shiny, raised, and smooth
- Stitching time: Fast
Pro Tips:
- Works great on thicker fabrics like denim or canvas
- Avoid using it for large fill areas—it’ll become too dense or fall apart
- Use pull compensation to prevent distortion on stretch fabrics
2. Fill Stitch (Tatami Stitch)
Your main option for larger areas that need consistent texture.
- Best for: Logos, shapes, backgrounds, big designs
- Look & feel: Flat, woven texture
- Stitching time: Moderate to long (uses more thread)
Pro Tips:
- Use pattern fills or motif fills in Hatch to add texture
- Adjust density for different fabrics—less for knits, more for wovens
- Combine fill with satin borders for extra definition
3. Run Stitch (Straight Stitch)
The most basic and flexible stitch. Also the most underrated.
- Best for: Fine detail, sketch-style embroidery, redwork, travel stitches
- Look & feel: Thin, clean lines
- Stitching time: Very fast
Pro Tips:
- Great for outlines and delicate features
- Use multiple passes for bolder lines
- Essential for jump stitches and travel paths
4. Triple Run Stitch
Like a bold run stitch—perfect when you need strength and visibility.
- Best for: Small outlines, accent lines, manual underlay
- Look & feel: Slightly thicker and more defined than a run stitch
Pro Tips:
- Great for contrast stitching
- Ideal for fine detail that needs to stand out
- Use when regular run stitch looks too faint
5. Motif Stitch
Decorative stitching with patterns like hearts, diamonds, or stars.
- Best for: Borders, special effects, kidswear, and home décor
- Look & feel: Repeating patterns within paths
Pro Tips:
- Use sparingly to avoid clutter
- Best when used on non-stretch fabrics
- Combine with fill or run stitching for dynamic results
6. Stem Stitch (Manual Stitching Effect)
Mimics hand embroidery—great for artistic projects.
- Best for: Floral designs, traditional or vintage-inspired pieces
- Look & feel: Flowing, hand-stitched texture
Pro Tips:
- Experiment with stitch angles for a more natural flow
- Looks amazing on linen, cotton, or embroidery hoops for display
Choosing the Right Stitch for Your Design
Every project is different, so here’s a cheat sheet to help you decide:
| Design Element | Best Stitch Type |
| Small text (under 1″) | Satin |
| Large letters | Fill or satin + fill |
| Thin outlines | Run or triple run |
| Large background areas | Fill or motif fill |
| Decorative edges | Motif or satin |
| Fine detail (faces, lines) | Run or triple run |
| Artistic effects | Stem, motif, or fill |
Fabric Matters: Adjust Your Stitch Type Accordingly
Different fabrics behave differently under the needle. Here’s what to keep in mind:
Lightweight Fabrics (t-shirts, linens):
- Use lighter density in fill stitches
- Stick to run or satin to avoid puckering
- Add a tear-away stabilizer
Heavy Fabrics (canvas, denim, hats):
- Use satin or bold fills
- Higher density is okay
- Add multiple underlays for structure
Stretchy Fabrics (jersey, knits):
- Reduce stitch density
- Use ballpoint needle
- Add a cut-away stabilizer and test your pull compensation
Customizing Stitches in Hatch
One of the best parts of Hatch Embroidery is how flexible it is. Once you pick a stitch type, you can customize:
- Stitch angle: Changes the direction of the thread pattern
- Density: Adjusts how close stitches are placed
- Underlay: Adds support beneath the top stitches
- Pull compensation: Helps keep shapes accurate on stretch fabrics
- Patterns & effects: Motifs, waves, curved fills, and more
Experiment with Hatch’s Object Properties Panel to fine-tune your stitch types and get pro-level results.
FAQs About Stitch Types in Hatch
Can I mix different stitch types in one design?
Absolutely! Most professional designs use a mix—satin for text, fill for large areas, run for outlines, etc. It adds depth and visual interest.
What’s the best stitch for 3D puff embroidery?
Use satin stitch, with widened column widths and adjusted density. 3D puff requires manual adjustments for depth.
How do I know if my design will stitch well?
Always do a test stitch on similar fabric. Hatch also has simulation tools that let you preview the stitch path before you sew.
Should I use auto-digitize in Hatch?
It’s okay for very simple designs, but for logos or complex art, manual digitizing gives far better control and cleaner results.
Want Expert Help? Let Digitizing Buddy Handle It!
Not everyone has time to learn the ins and outs of every stitch type—and that’s okay. If you’ve got artwork, a logo, or a design you want professionally digitized with the perfect stitch types, Digitizing Buddy is here to help.
They offer:
- Manual, professional digitizing
- Fast turnaround (12–24 hours)
- All major file formats (PES, DST, JEF, and more)
- Free revisions
- Perfect stitch balancing for every fabric type
Whether you’re stitching hats, bags, shirts, or home décor, you’ll get a clean, machine-ready file that looks stunning from the first stitch.
Final Thoughts
Choosing the right stitch type in Hatch Embroidery isn’t just a technical step—it’s a creative decision. The right stitch makes your design pop, enhances durability, and brings your artwork to life.
With practice—and some help from tools like Hatch—you’ll be able to create stunning, professional embroidery designs. Or, you can save time and let the pros take care of the hard part.